The Five Do's and Don'ts of Kettlebell Training
There Are No Two Ways About It — Training With Kettlebells Is A Lot Of Fun.
But for the uninitiated or inexperienced, it can be a difficult process. From a technique standpoint, there is a lot to learn. This is when you begin diving deeper into things.
One by one, you start unpacking the complexities and depth of the main movements (what I call “the Super Six”).
You start to realise, that while you know a little bit, there is still so much to learn!
Unless you’ve received 1-1 kettlebell instruction or hands-on coaching, you likely won't be doing things the right way. Or to the level you are capable of.
Which will slow down your growth & the progress you make.
Not to mention the common injuries you might pick up that are associated with using improper techniques.
This is why the skill acquisition phase can feel so steep and even frustrating.
There is a learning curve that requires you to lift a certain way, and you need to understand what optimal technique looks and feels like.
Training with kettlebells differs from your traditional gym equipment.
It's for this reason I wanted to share with you a list of do's and don'ts. So you can get more out of your kettlebell training — starting right now.
Let's dive in!
#1 - DO: Bend From Your Hips ✅
When it comes to doing kettlebell ballistics: swings, cleans, and snatches, it’s all about developing hip power.
The way you do this is through a strong “hip hinge” — where you ‘open’ and ‘close’ your hips.
You do this by first getting into hip flexion (bending from the hips) to load the posterior chain.
This is akin to drawing back a bow.
And then you transition to hip extension (straightening from the hips) which produces the power from the glutes.
This is where you release the proverbial arrow.
As with the bow and arrow, the further back you draw, the further it will go.
The more you bend, the further you must extend = more power and more muscle fibres recruited.
I teach my students to find their deepest hip hinge. This is the largest bend at your hips.
It is also called an “athletic hinge”.
#1 - DON’T: Bend From Your Back ❌
Rounding your back (spinal flexion) places excess shear forces on your spine.
When you do this, the discs in your spine compress on one side and push the fluid backwards, which can lead to a bulging disc.
Put simply: Repeatedly bending your spine is a recipe for a back injury.
This is why it’s imperative you learn to master the hip hinge.
Discovering how to position your back at the correct angle, and moving from your hips — NOT your back — will save your spine.
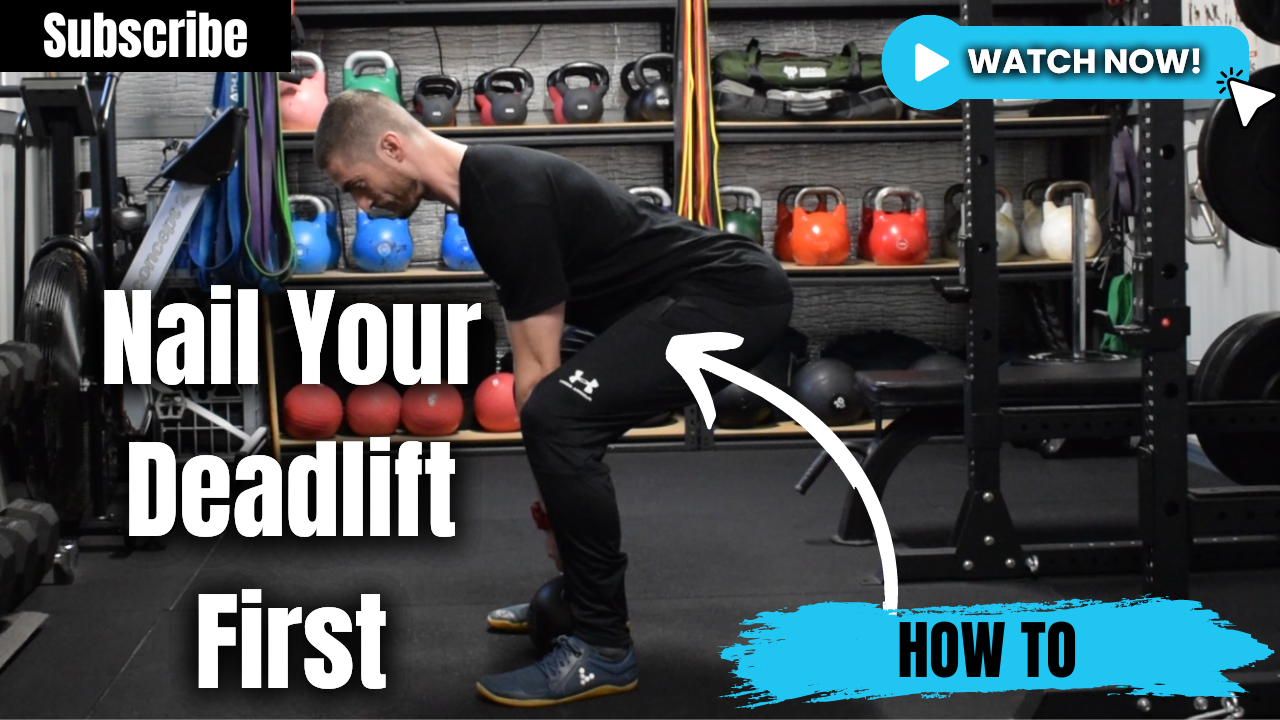
Learning how to deadlift correctly is the first step to stop bending your back into positions it shouldn’t be in.
You can learn how to nail the kettlebell deadlift in the video below.
#2 - DO: Get Tight, And Stay Tight ✅
“Tension is power”.
This is your ability to generate high levels of muscular tension. Getting your muscles to contract hard, ‘at will’, and whenever called upon.
Getting tight creates stability for your body.
The more stable you are, the more strength you can display.
To put it another way, the heavier you can lift, and with less risk of injury.
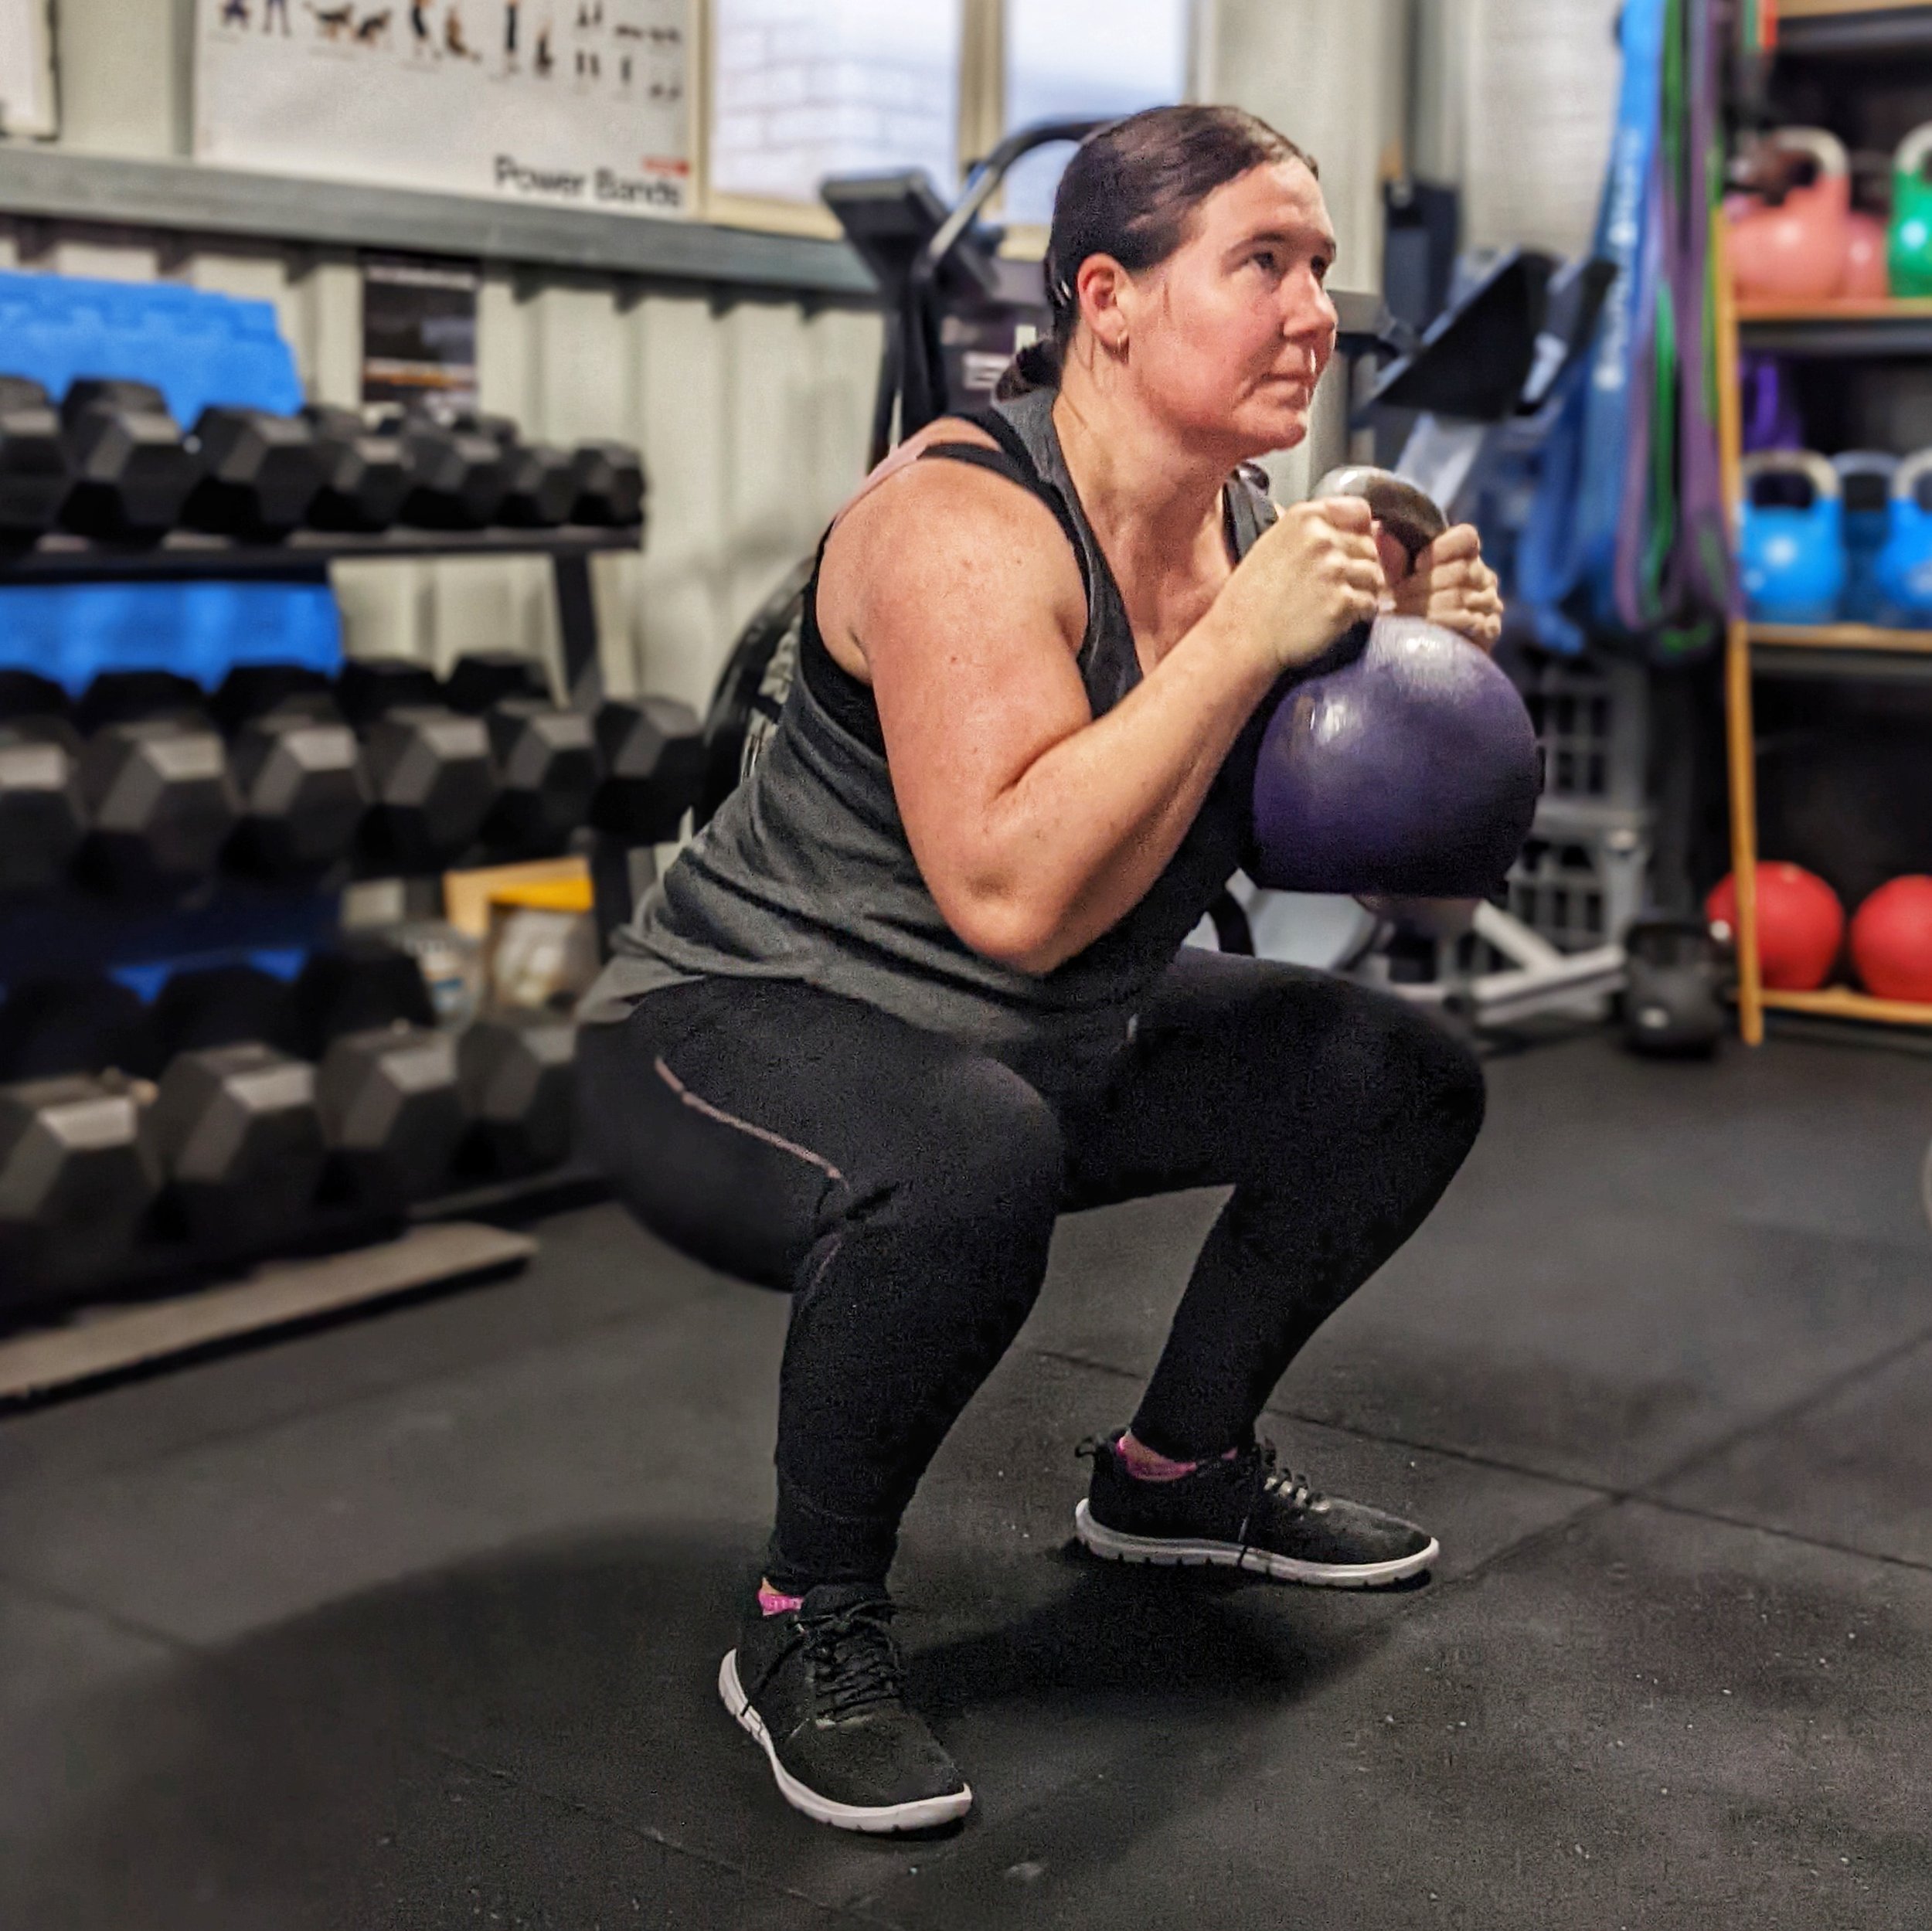
For example: when doing a squat, your midsection should remain rigid, tight, and solid (your trunk/torso should not move). While there is movement at your hips, knees, and ankles.
For each exercise, there are muscles we want to be involved and there are others we don’t.
You must learn to turn them on and off like you would a light switch.
#2 - DON’T: Relax And Let Your Body Get Soft ❌
When you relax and allow your working muscles to ‘switch off’, you lose stability and strength.
This reduces your ability to produce force, and this is what keeps you safe when lifting heavy loads.
If you want to become stronger, you must learn to get tighter — and stay that way!
Getting a little bit tight is not enough. You need to get the appropriate muscles to contract, hard.
Think of it like a “power bar” (like in a video game). When you are relaxed and at rest, your power level is low.
Then when you power up AKA “get tight” your power level rises, and you have more and more strength to display.
Does that make sense?
Bottom line: The softer you get, the weaker you are. The tighter you get, the stronger you are.
#3 - DO: Use As Much Energy And Tension As Possible ✅
When I say use as much energy as possible, I mean it. Don’t hold back, and do not leave it in the tank.
If you’re doing kettlebell swings, I want every single rep to be powerful not just a few.
If you’re doing Turkish Get-ups, I need you to focus on working your muscles hard and staying tight from start to finish.
If you’re doing a set of kettlebell snatches, it’s imperative that you extend your hips violently to produce maximum power.
Kettlebell training is ‘energy draining’ by nature.
This is great for building strength, gaining muscle, fat loss, and developing power.
You want your muscles to work maximally on ‘ballistics’ and contract forcefully during your ‘grinds’.
If you’re unfamiliar with those terms, check out my previous article, The Two Types Of Movements In Kettlebell Training.
You’ll have a much better understanding of what they are and how to get the most out of your practices.
Holding back does just that — holds you back.
By putting more energy and tension into your kettlebell exercises, you will get more out of them.
This means better results in less time.
Who wouldn’t want that?!
#3 - DON’T: Conserve Energy And Save It For Later ❌
When you keep energy in reserve, what ends up happening is you create “energy leaks”.
This can lead to compensation patterns and your body cheating when you do your exercises.
You don’t want that.
If it’s the glutes’ job to extend your hips, make sure they’re doing just that.
If your midsection needs to be tight to prevent your back from arching, make that happen.
If you have to use a crush grip on the kettlebell to get more out of a given exercise, squeeze that bell tight.
Please do not confuse intense training and contracting your muscles hard to mean you “max out” every training session. This is not what I mean.
Your regular kettlebell training should have you working around 80% most of the time.
During your sets, hit your reps and work hard. Then, rest, recuperate and recover so you can repeat that effort during the next set.
You can think of it as interval training.
Work set = hard
Rest period = easy
Overall feeling = comfortably difficult
Hopefully, you can see how that works.
It’s not like a bank account where you try to save up as much energy as possible. This will mean fewer and slower gains for you.
Drain the (energy) account and work it hard so it needs refilling.
The way this happens is by your body adapting — getting stronger, with more muscle, burning extra body-fat, and recovering quicker over time.
#4 - DO: Lift As Heavy As Your Technique Allows ✅
The weight you select is as important as the exercises themselves. Maybe even more important.
In order for you to build muscle, get stronger, and build work capacity, your training needs to challenge you. That’s a given.
It should be light enough that you can do the exercises correctly and with the appropriate technique. But it must also be heavy enough to elicit an adaptation.
Your body needs a reason to change and adapt — give it one.
This means pushing you to the point where your body improves itself to handle the increased work that it’s being asked to perform.
Below are some ways you can accomplish this;
Lifting heavier loads (intensity)
Increased total number of lifts (volume)
More work in less time (density)
Extra Time Under Tension (TUT)
This is the “Goldilocks zone” — Not too heavy. Not too light. But just right.
#4 - DON’T: Go As Heavy As You Possibly Can ❌
I recently saw a video on social media of a gentleman doing one-arm swings with a 58kg bell.
On the surface, you might read or see this and think: “Holy shit. That’s impressive!”
But, I didn’t see it that way. Here’s why.
The swings looked like crap.
He had a huge elbow bend and the bell wasn’t getting anywhere near chest height.
This tells me one thing — his ego is driving his training. Not his ability to stick to a weight that his technique can handle.
Anyone can grab a kettlebell that’s really heavy and move it poorly. Then post it online (of course) for likes and a quick ego boost.
But that’s not the goal of training…is it?
He would be better served by dropping down a few bell sizes and getting the bell floating to shoulder or neck level.
Drop the ego, lift the appropriate weight, and do the exercise to the highest standard you are capable of.
#5 - DO: Train Barefoot Or In Minimalist Footwear ✅
Your feet have many nerve endings, sensors, and muscles. Yet most people have very weak and immobile feet, toes, and ankles.
Having your feet trapped in shoes all day, every day will do that to you. Make the muscles weak, stiff, and unable to move properly.
This has a knock-on effect that impacts other parts of your body.
When a body part or muscle group isn’t functioning optimally, problems arise “upstream or downstream”.
Being barefoot allows your toes to splay naturally, touch and feel every surface, and get stronger with every step you take and repetition you perform.
Training sans shoes will strengthen your toes, feet, ankles, and lower leg.
Added bonus: you will produce more force.
Because you now have direct and unimpeded contact with the ground. Every bit of force you put into the ground will work for you and be put into the kettlebell.
It won’t be absorbed into your shoe and then disappear into thin air.
Taking your shoes off, or at the least, wearing minimalist footwear will mean more strength, stability, and power production.
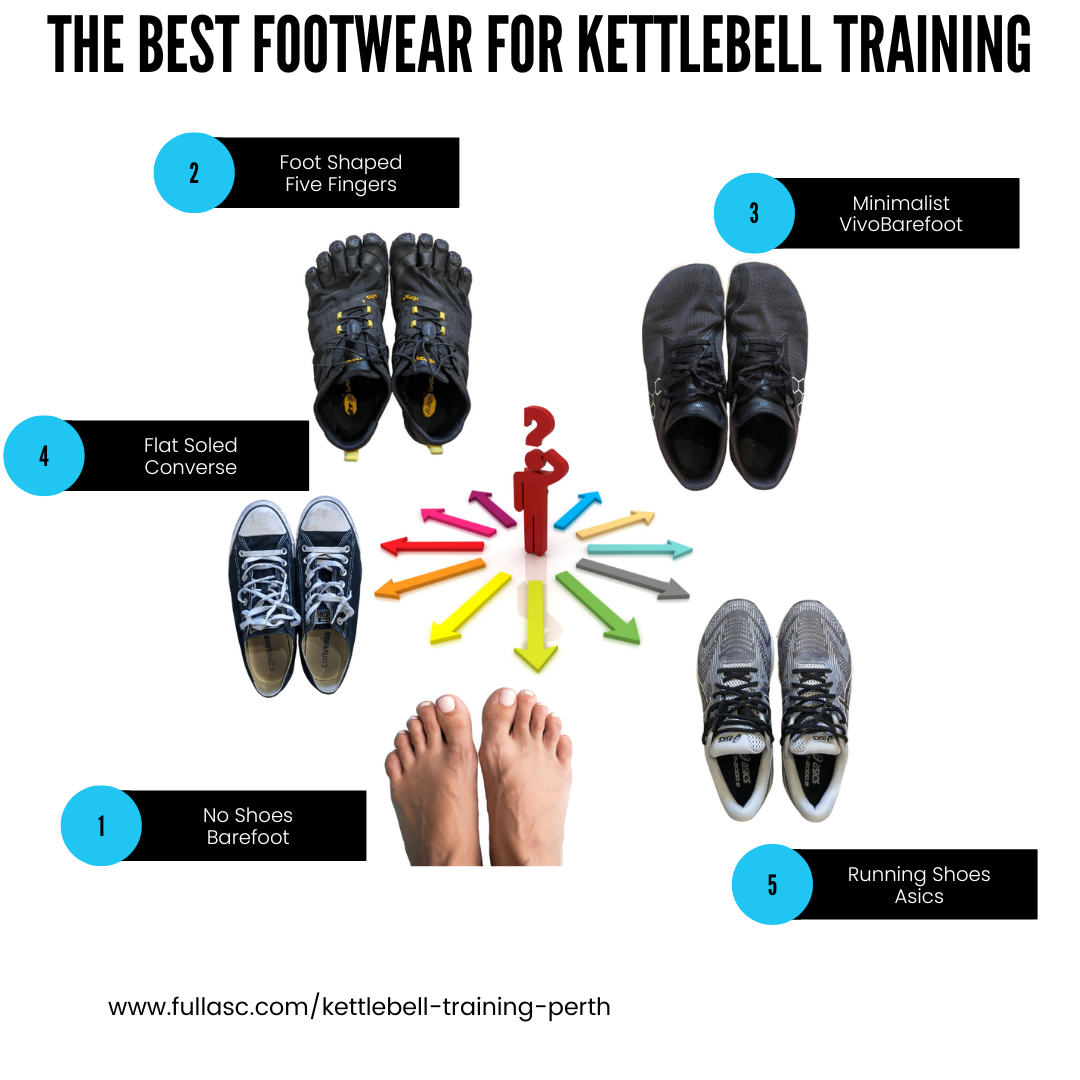
Below is my recommendation of the best footwear for kettlebell training, numbered from 1 (best) to 5 (worst).
#5 - DON’T: Lift In Soft, Squishy, Cushioned Shoes ❌
Would you attempt a heavy squat or deadlift on your mattress?
No. Why not?
Because it’s unstable. That’s why.
What about a set of crisp, explosive kettlebell swings on a nice, spongy piece of foam?
No. Why not?
It’s soft, unsteady, and wobbly. Pretty obvious.
So why would you want to lift any kind of weight in running shoes? Or sport some footwear that is only worn because it’s fashionable or is the current style that everyone else is wearing?
That’s right…you wouldn’t.
This is why you shouldn’t do your kettlebell lifting in running shoes or anything that has a big heel lift on it.
It’s not going to improve what you do or enhance the results you get. In fact, it’ll likely make everything you do worse.
Shoes nowadays are shoe-shaped, not foot-shaped. Seriously — think about it.
Grab a pair of shoes and see if your feet can maintain their natural shape. Or if they need squishing and cramming in a narrow toe box with your heel elevated.
Let your feet be feet and give them all the space they need with minimal or no cushioning.
Don’t weaken your feet, strengthen them.
Want To Speed Up The Learning Process?
I offer kettlebell training in Perth for those who want to level up their skills and strength. And an online kettlebell course for those who live interstate or overseas.
Having a certified kettlebell instructor teach you the best practices and show you the strongest techniques goes a long, long way!
It will speed up your development and allow you to get more from your kettlebell practices.
When you know what to do and how to do it, everything starts to click. The process becomes quicker and much more enjoyable.
That’s why I take the time to write such in-depth articles and produce informative videos. To help those who want help.
But that’s only one way of consuming information.
The most superior method for learning and developing these skills is through kinesthetic feedback — “doing”.
Having a coach’s eye closely monitor how you move will provide you with critical feedback so you progress at the fastest rate possible.
If you’re ready to learn, I’d love to teach you. Get in touch today to fast-track your journey.
All the best to you on your kettlebell practice!